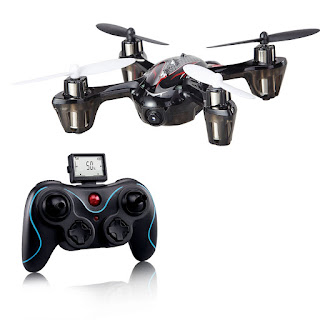
Setting up the Quadcopter controller
1.Checking transmitter channels:
-Take off the propellers.-Turn on transmitter and flight controller.
-Set throttle to about 1/4. Motors should start.
-Move pitch (elevator) stick forward. Back motor should speed up. If not, reverse pitch (elevator) channel. -Move roll (aileron) stick to the left. Right motor should speed up. If not, reverse roll (aileron) channel. -Move yaw (rudder) stick to the left. Front and back motor should speed up. If not, reverse yaw (rudder) channel.
2. Transmitter throttle adjustment:
- Turn on transmitter and flight controller. - If led does not turn on and stays on, lower your trim.
- If still no go, you may need to reverse the throttle channel.
- Arm your board by putting the left stick down and to the right for the LED to come on. If this does not happen, adjust your throttle and yaw trim down and to the right on your transmitter. Make sure you do not have any mixing switches on your Transmitter enabled.
3. Initial transmitter ATV/servo range settings:
- Pitch (elevator): 50% - Roll (aileron): 50% - Yaw (rudder): 100%4. ESC throttle range:
- Turn yaw pot to zero.
- Turn on transmitter.
- Throttle
stick to full.
- Turn on flight controller.
- Wait until the ESCs beep twice
after the initial beeps. (Depend on which ESC's)
- Throttle stick to off. ESCs
beep.
- Turn off flight controller.
- Restore the yaw pot.
5. Initial Gyro gain pot value is 50%.
Increase until it starts to oscillate
rapidly, then back off until it is stable again. Fast forward flight needs
lower gain. Too low gain is recognised by the Quadcopter being hard to control
and/or always wanting to tip over.
6. Checking gyro directions:
- Take off the propellers.
- Turn on
transmitter and flight controller.
- Set throttle to about 1/4. Motors should
start.
- Tilt Quadcopter forward. Forward motor should speed up. If not,
reverse pitch gyro.
- Tilt Quadcopter to the left. Left motor should speed up.
If not, reverse roll gyro.
- Turn Quadcopter CW. Front and back motor should
speed up. If not, reverse yaw gyro.
7. Reversing gyros:
- Set roll gain pot to zero.
- Turn on flight controller.
-
LED flashes rapidly 10 times.
- Move the stick for the gyro you want to
reverse.
- LED will blink continually.
- Turn off flight controller.
- If there
is more gyros to be reversed, go to step 2, else set roll gain pot back.
8.Final check:
Place the quadcopter on the ground, stand back a safe distance
and slowly advance to about ½ throttle. Hold it steady when you start
increasing the throttle, because the Quadcopter controller calibrates its gyros
when throttle leaves zero, and then the gyros need to be at rest. If the
quadcopter tries to twist away, check propeller and motor directions, gyro
placement and trim settings. A slight twist is OK. If not, try to twist the
quad. It should resist your movements. More gyro gain gives more resistance. If
it starts to oscillate, reduce the gain. You should not need to reduce the gain
below 40%. Note: the correct procedure for taking off from the ground is as
following: 1: The quad and its propellers needs to be motionless. 2: Increase
the throttle (collective). Just as the throttle leaves zero, gyro calibration
is performed. 3: Enjoy! And remember to close the throttle if you lose control.
Much less damage. NOTES: Do not use bigger propellers than you need. Light
propellers give faster response and more stability. Try to get it to hover at
about mid stick (1/3 to 2/3 throttle). Use smaller/bigger propeller, different
motor Kv or more/less Battery cells to achieve
that. Mounting the Quadcopter controller in your Quadcopter. The Quadcopter
controller uses Murata piezo gyros that are less sensitive to vibration than
SMD type gyros, but it is still a good idea to mount the board on a vibration
dampening material. The board must also be mounted with the white arrow facing
the direction of forward flight. When connecting your Remote Control Receiver
(RX) you must connect the white signal wire of the channels (CH1, CH2, CH3 and CH4)
from your RX corresponding to the aileron, elevator, throttle and rudder to the
inner pins on the board while the red (VCC) wires are connected to the center
pins, and the black (GND) wires are connected to the pins on the outer edge of
your board. The pins marked M1 to M4 are connected to the 3 pin BEC plug from
your ESCs. They follow the same convention as the RX pins with the white wires
connected to the inner pins, the red wires to the center pins and the black
wires to the outer pins. The ESCs and the connected motors are plugged onto the
pins M1 to M4 in the following order depending on flight rotor configuration.
Note also the direction of rotation for each motor. This is achieved by
connecting the three ESC wires to the motors and swapping two of the wires to
achieve rotation in the opposite direction.

No comments :
Post a Comment